Assignment:
Design a luninaire using two materials that you used in previous projects, plus one new material of your choosing. Your luminaire should create a field of light that articulates the surface upon which it is cast. The light source is to be a compact fluorescent bulb in a standard electric bulb socket.
Phase 1: design research
I am sure with this assignment I’d like to design something that will be useful to me. Immediately, I wanted to stir clear of lamps…it seems to be so expected. Well, the observation begins.
This happens to be a perfect season for it. I visited a nearby lake in mid-day. It was absolutely breath taking. The light of sun reflects on the lake, the sunbeams dance about the golden trees. (Golden brown, orange, yellow, and red) What a reflection gracing upon the lake – the collage of nature.
That’s it! My two materials from previous projects will be from the very first assignment…Nature.
Monday, November 9, 2009


Precedent Analysis

http://www.sculpture-design.com/Montana/rustic_artistic_lava_rock_and_nature_lampshade%20%282%29.JPG

Luminescence - wood shop
This is my first visit to the wood shop. In this photo, Kurt is scaling down my 7ft. branch. I'm repurposing - it was scavaged from the side of the road. 


Luminescence - wood shop
Matthew is securing the wood to drill a 4" (depth) x 2" (diameter) hole in the center. This is where I plan to insert the bulb and the portable luminaaire....However, I actually need it to be 6" Deep. I'll have to do a little more gutting out the center after he gets it started. A trip to Lowe's.

Luminescence - wood shop
The wood is wet, very wet. Matthew explains that this makes it more difficult to penetrate. We are also cutting against the grain; therefore, I'm asking for almost the impossible. Matthew reassure me that he is up for the challange... Am I?

Luminescence - drilling video
This entry is experiencing technical difficulties!! Please check back soon.

Luminescence - product development
Now time to add some interest; as well as an element that the light will reflect. I choose these twigs that curl for the pattern it may create as shadows on the wall. I found them on the side of a road, where I nearly ended my life trying to pick up. 


Luminescence - product development
Ok...the cord was a problem! I had to figure out how to get the cord down the middle. I inserted a curtain rod about ¾ " in diameter for a smooth insertion. Therefore, I had to cut the cord and then reattach it. Old skool. Tommy enjoyed helping me with this ( I think). We totally reconfigured the entire wiring system. It worked and we didn't get Electrocuted.


Thursday, October 29, 2009
Understanding DiALoG
The assignment: Create 2 spaces with materials listed, bristol can be subject to 1 fold, however, not required. Assemble a collage/parti prior to approaching space.
The materials: 12 sheets of 4x6 bristol, 12 skewers
objective: The spaces must have a clear dialog
obstalces: When does negative space create another space
opportuntities: avoiding Negative space
The materials: 12 sheets of 4x6 bristol, 12 skewers
objective: The spaces must have a clear dialog
obstalces: When does negative space create another space
opportuntities: avoiding Negative space
Take 1
How can I design two spaces that speak the same language? How will the spaces relate to one another in it's design elements (proportion, balance, repetition, size, Navigation of space- My thought is fold the bristol in half (vertically), then overlap them by applying paper cement, creating a series of steps. Thus making use of the space in the steps and behind them. OK...I built this and it was critiqued by Kuniko and Tommy. Kuniko feedback...the space doesn't speak the language I've claimed...which is "navigation of space" and further she states that the dialog between the spaces is not clear. Tommy argued that the stairs do not create two spaces. However, by placing the skewers vertically alongside the every other stair, would clearly define the spaces I've intended. Sorry, no image available.
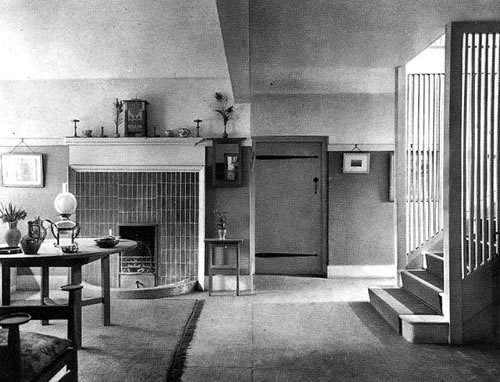
Ironically, during my architectural history class the instructor presented a photo of The Orchard House by CFA Voysey; the photo is identical to the FIX Tommy provided.

http://www.artsandcraftsdesign.com/clocks/images/PaintedtempusattheOrchard1899.jpg
Ironically, during my architectural history class the instructor presented a photo of The Orchard House by CFA Voysey; the photo is identical to the FIX Tommy provided.
http://www.artsandcraftsdesign.com/clocks/images/PaintedtempusattheOrchard1899.jpg
Take2
Designing these spaces with these specifications is not as easy as I’d imagined. I tried several times and approached in several different manners; without any luck.
A Parti or Parti pris / from the French Prendre parti meaning " to make a decision ", often referred to as the big idea , is the chief organizing thought or decision behind an Architect's design presented in the form of a basic diagram and / or a simple statement. Reference - en.wikipedia.org/wiki/Parti
Here’s my parti --- maybe I can figure this out finally.

Take4
With this concept/language...Design by numbers, I'm now ready to face the skewers and bristol again.
I've abandoned the idea of the steps. Based on the constructive feedback along with the time in the critique room; I have a clearer understanding of the concept – DiALoG.
I've abandoned the idea of the steps. Based on the constructive feedback along with the time in the critique room; I have a clearer understanding of the concept – DiALoG.
I've used two pieces of foam board and lined them in a linear format creating the 12 x 12 base.
There are two boxes stacked joined by two sets of skewers on opposing sides to excite instrestSECTION CUT
 FRONT ELEVATION

.


Monday, October 19, 2009


Friday, October 16, 2009


understanding UNITY - Take 4

Understanding UNITY - take 3
Oooops...cutting the bristol is ILLEGAL! Back to the drawing board. From the advice of Tommy, I have been over doing it. Taking a simple task and creating a complex situation. So it's time to simply. Here's a sketch of a potentially simply fix.
 Well, I tried and tried and Rachel is my witness. This just didn't work out for me. Once the bristol was glued to the skewers it created tension at the bending point, which then resulted in the sticks stretching and exasperating in areas that were not desired.
 Well, I tried and tried and Rachel is my witness. This just didn't work out for me. Once the bristol was glued to the skewers it created tension at the bending point, which then resulted in the sticks stretching and exasperating in areas that were not desired.
 Understanding UNITY - Take 2
.jpg)
After working on a project for 110 (Design Visualization) I've been inspired by circles. Here's an idea! I cut each of the 12 pieces of bristol in strips (4"(L) x 3/4" (W)) - then glue them at the ends to create a circle. Now, to unite them with the skewers, I'll again use hot glue to attach them one by one; thus creating a linear tower of ringlets. Here's what I ended up with during the processing stage.
Tuesday, October 13, 2009
Understanding UNITY
Assignment: Unite a structure on a 12 x 12 base - using only - 12 skewers, 12 pieces of bristol (4x6 ea)

My first attempt---doesn't seem quite unified. The skewers and the bristol doesn't seem to be speaking the same language.

My first attempt---doesn't seem quite unified. The skewers and the bristol doesn't seem to be speaking the same language.
Monday, October 5, 2009


Subscribe to:
Posts (Atom)