Thursday, February 25, 2010

divide + conquer


The artist use color to give a sense of reality.

http://www.flickr.com/photos/petescully/4371044891/


The artist use lines to give direction and flow.

http://www.flickr.com/photos/glwsketchworks/4334209764/in/set-72157623118673855/


The artist uses negative space to define objects and color to make give a bold contrast.
http://www.flickr.com/photos/lapinbarcelona/4395599731/


Thumbnails - EUC

Wednesday, February 24, 2010

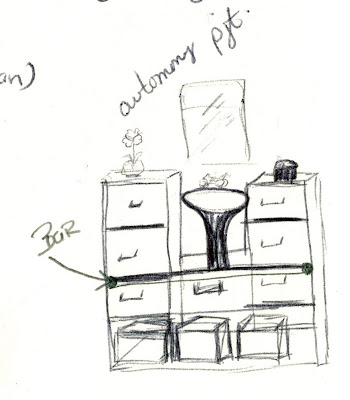
Autonomous Project - 1/2 bath Specs


Automouns Prjt...initial sketch

Autonomous Project

Assignment: Document and then present your "Design Process Ritual".

Judgment of final project work will include:
Process, Development
Material use, craft, quality, and appropriateness to ritual
Relationship of parts to whole,
Representation and presentation
I've decided to build a storage unit for the 1/2 bath in my home. The builders didn't leave any space for accent pieces (for functionality or decorative purposes). In addition, cabinet makers haven't considered these spaces much.

Beginning the design process for this project; I thought I should start off with what I do NOT believe is designed well for this space.
http://nzexplorer.co.nz/zoom_focus/images/zoom_focus/kohler/bathroom_storage_cabinets.jpg


Friday, February 19, 2010

2 vertical moments of light

Process:
Inspired by images of light by Tadao Ando and others artists;
I wanted to imitate the cross defined by piercing light with a twist of color.
After the research I began to sketch

Materials:
8 oz water bottles
Kool-aid
Cardboard
Hot glue
Velum
Box cutter

Thoughts:
How to unify surrounding windows
With the four windows in the immediate area, I proposed to the group to spell IARC
Critiqued by Doug and Vanessa, we set aside that idea
Feedback from the TA’s suggested that I should do further research on light and color
After doing so…my project evolved to:
Gluing 23 triangles from 14” stripes of cardboard
Then Stacked triangles in the window
Placing the kool-aid bottles in the center of the triangles in order that the light may reflect off the bottle
Following a critique by Stoel, I realized yet again that my design process was still not over

Final:
Discovering that the triangles stacked in the windows didn’t actually create an effect; the light simply passed through. So I began to cut cardboard to cover the negative space created by the triangles.
I didn’t accomplish what I needed using that method; however I still needed to control the light more and darken the negative space to create Moments of light. I removed all the triangles from the window and then laid them on a single piece of cardboard (at the exact dimensions of the window). I lightly traced the triangles, and then removed them from the single sheet of cardboard. I was able to see the negative space and cut out where I needed. I went a little further and kept some triangles solid to create yet more interest. Then white velum is placed behind 4 triangles to follow a water fall motion the window above has created to achieve the unity between the two.

So out went the bottles and in came triangles and moments within each triangle busting with light and a softer, muted light with the velum.


Thursday, February 11, 2010

Thinking Composition


http://travellingboard.net/wp-content/uploads/2008/03/prada-store-new-york1.jpg


http://www.internet-cafe-guide.com/images/prada-store-fifth-avenue.jpg


http://designerfriend.files.wordpress.com/2009/03/prada_02.jpg


http://graphics8.nytimes.com/images/2006/04/27/fashion/shop.span.jpg


Thinking composition - final product

My Ritual

Ritual item: Book titled “My Pocket PRAYER Partner for Women”

The morning’s come and it’s time start another day which can be interpreted into one decision after another. This can then be translated into one opportunity after another. I have developed a daily ritual to help prepare me in my never-ending decision making. When I arise I take care of the preliminaries with my hygienic ritual; then I move on to soul searching. I head downstairs to the breakfast nook and reach for my book. It is tucked away in a custom built (old world style) caddy. I open the passage way to begin the soul searching; the book sits majestically, in place. The caddy has a compartment designed for storage, thoughtfully placed beneath the book. There I can faithfully find my favorite pen and highlighter in its custom built holder. There are a few tea lights and a lighter that I retrieve from the compartment as well. I use these to set the tone. Once the candles are lit and coffee in hand…I begin to read carefully the words on the pages. For twenty minutes I indulge myself into non-interrupted, thought provoking subject matter “how to face the day”. Following the expiration of time, I carefully blow out the candles and place my book, pen, and highlighter in the caddy for safe keeping. Until next time!

Ritual item - Process, Development

Ritual Item - Final Product


Ritual Item - Self Critique

Materials: Plywood, strap-pile from Lowe’s Home Improvement stores,Screws (silver),Nails (black), Decorative Nail heads, Wood glue, Wood Stain

Use of Materials:

The plywood was a poor choice. I used it because it was free; it was too late when Stoel warned us…I was already in too deep. The wood buckled which made measuring with 100% accuracy impossible. It also shattered or split when hammering.

The silver nails were an eye sore; therefore, I covered them with black nails and decorative nail heads to make it aesthetically pleasing.

The development:

Initially, I made a model from scrap foam board. I discovered a few missing components, such as, a place for the book (the ritual item to rest upon). Once I figured that out; I thought it was time to move on, but the dimensions were off quite a bit. The book didn’t fit. Disastrous! So I went to the sketchbook and reconfigured the measurements, which meant the object had become twice the size I had originally anticipated.

Once in the woodshop I quickly became accumulated with several of the machines, for time was of the essence. However, I had to revisit and revisit on several occasions due to the facts of the wood. The major area of concern was the sides of the box. The wood buckled in places that affected that opening space – the top measured at 2.25” and the bottom measured 2.38”, and this is where I needed to cut wood to insert the sides. Well, I cut it 3x’s for each side and never ended up with a perfect fit. I contemplated allowing the material to decide the design, but luckily discovered the claps. So I used wood glue as the binding agent and the claps to secure the fit and apply pressure over night. The next day I discovered that what I’d hoped for didn’t work. As I inspected the box and applied pressure in the areas of concern, I realized that reinforced pressure would make the wood cut for the sides fit. As I began to hammer the first nail, the face of the box slit, I paused with deep concern. I decided to continue, and the panel connected to the box by hinges split. I wanted to give up. I added some wood glue to that area and then applied another screw to that was a bit longer to help repair the dismantled panel.

Next item to tackle…the panels are not stopping, they swing beyond the desired point. I didn’t know how to approach it. It took several days, and I simply added a small strip of wood along the base of the opening and it worked.

To give the box an “old world” appearance and to add contrast, I decided to add a bit of dark wood stain. First to the panels…and then there comes a problem. The stain wasn’t dry before I over zealously began to open and shut them. As a result the small amounts of the stain bleed on the face of the box. I tried sanding, but it really tarnished the box. Then I bought a lighter wood stain (natural), not having any experience with this, I assumed it would fix the problem. Stoel discovered the mishap and introduced me to the chisel. That became the fix.

I decided to stain the face of the back piece of wood…so when the panels are opened there’d also be the dark wood (where book rests) Another accident…the wood stain appears on the back of the box. thought about leaving it there…but there was no rhyme or reason for it, so I stained the entire back side to the box. Happy accident as Tommy L likes to call it.

Thursday, February 4, 2010

Elephant man II


OK...so now I'm having fun. I thought about the whole scene and realized that there wasn't a sky. So I spoke with Carlos and he gave me yet more insight to making beautiful art.
He advised to use some light brown at the bottom, then leave some white (negative space), then add a very faded (washed) blue, leading up to darker blue at the very top. BEAUTIFUL.

Elephant man II


Finally...Suzanne was much pleased with this elegant and the man. I LOVE IT!
Following the instructions and tips from my feedback session as well as the much appreciated demo...my watercolor vignette look like most of my peers now.

the Color Purple


I am so proud of this painting. I used the techniques provided and I'm getting more comfortable. I even love doing it now.
Feedback...OK...so i still didn't get the technique here, per Suzanne and Tracey. Who actually laughed at my attempt ;) They said it looks like acrylic.
OK...here's additional tips from Suzanne (she also demonstrated). Thanks!

1. I need to add yet more water
2. Only need minute bits of paint and lots of water.
3. Dip the brush in the paint and yet again in the water.
4. Start on the edge and work it in the content of the object.

Well, let me just try it again...But I still love this vignette.

Monday, February 1, 2010

sketchbook - NYC


The lady is red is drawn in proportions in relation to body parts; however, not to scale with her surroundings. However the others are in proportions to their surrounding. I'm almost getting the hang of the water colors now. I've mixed the water more and let things run where they want to.

Sketchbook - Blind Contour


It's always fun to see what these will look like...I think I should have put more time in these...but my three stooges wouldn't allow it. I'm also, not comfortable with the water colors yet...this was still a practice run.

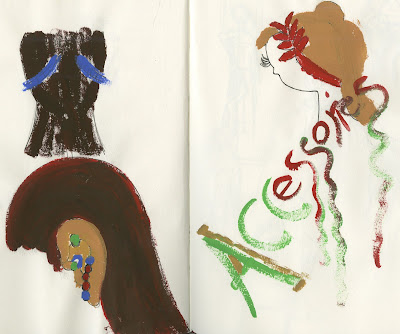
Sketchbook Assignment - Acccessories


I used the watercolors in tubes...I've now discovered that I didn't use enough water when mixing. Well, back at in the next run.